


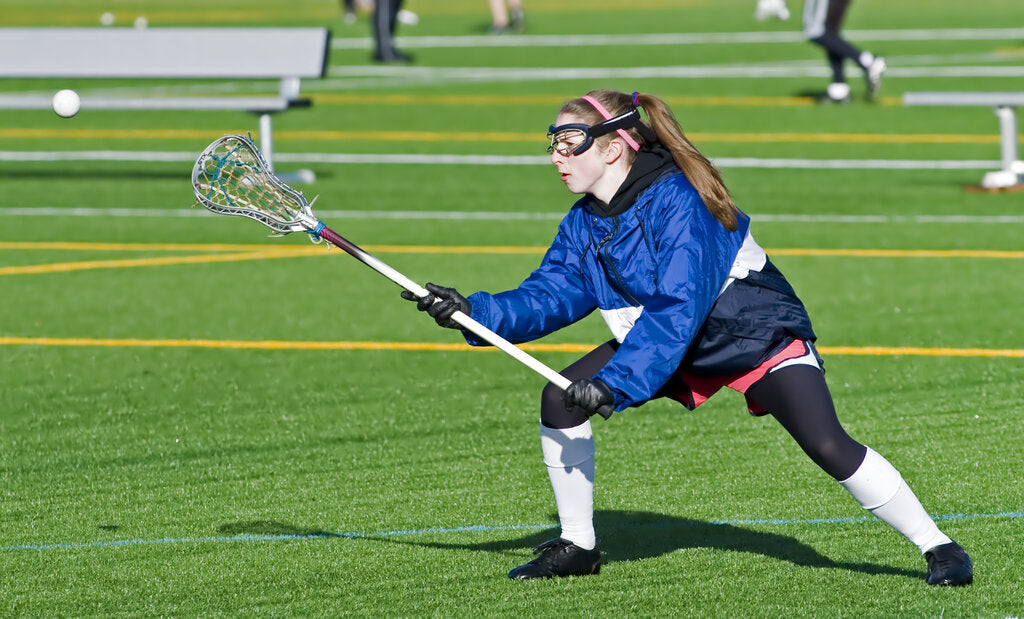
Learning correct lacrosse stringing is an integral part of your development as a player. It allows you to customize your stick's performance to suit how you play and your specific position.
There are several different types of lacrosse stringing, but in this guide, we'll focus on how to string a traditional lacrosse head with a mid pocket. Once you're confident with that, you can move on to more specific styles of stringing and restring lacrosse sticks as needed.
How long does it take to string a lacrosse head?
It varies by person, depending on how long you've been doing it, and how good you are at the precise movements and adjustments needed.
Assuming you're a beginner who hasn't got a clue about how to string a lacrosse head we'd estimate that you'll be able to finish the task in 30- 45 minutes once you've followed all the steps in this guide. And you'll undoubtedly improve on that with practice.
Be patient. While you're learning, getting the technique correct is much more important than finishing the job quickly.
Materials and equipment
Before getting started with this guide, you'll need to make sure you have all of the following:
1. Lacrosse stick with an unstrung head (obviously!)
2. Lacrosse strings (there are a few types of lacrosse string you will need)
- One lacrosse top string, around 36 inches long
- Two lacrosse sidewall strings, each about 30 inches long
- One lacrosse bottom string, approximately 8 inches long
- Three shooting strings
3. One piece of 10 diamond mesh
4. Scissors, to cut off the excess string
5. A lighter, to melt the ends of cut strings and prevent them from fraying
6. Needle nose pliers, to tighten the strings correctly
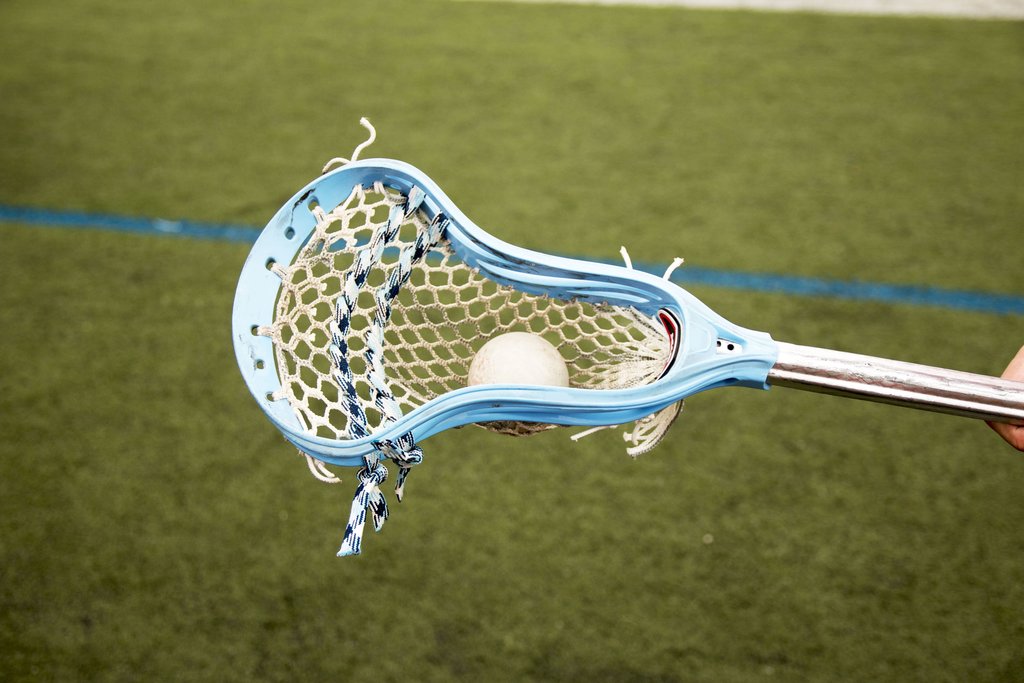
Preparing the mesh
Before you get to stringing your lacrosse head, you need to prepare the mesh. First, ensure you have your mesh oriented correctly. The top edge is the one with nine diamonds, and the bottom edge will have ten. (You may have heard of a 10 diamond top string, but 9 is more common, so we'll go with that in this guide.)
You should also make sure that the rougher side of the mesh faces inwards; this assists with gripping the ball and adding power to your shots.
Now, stretch out the mesh to its full extent. You must do this before stringing; otherwise, the mesh will stretch further after you string it, and your lacing may sag in certain areas. If you're using a hard mesh, you might find that running it under hot water while you're stretching it out makes it easier to manipulate.
Once you've stretched the mesh, fold over the top row of nine diamonds so that the holes match up precisely with the second row of diamonds beneath. Now you're ready to start stringing.
General tips
To properly string lacrosse heads, there are a few general tips you should keep in mind:
- Your strings should always be as tight as possible. Use your pliers to ensure maximum tightness at each stage. You don't want your lacing to come loose or undone during a game.
- Symmetry is important. The diamonds, lacrosse strings, and knots should all line up as accurately as possible to ensure your stick doesn't have any bias towards the left or right. You want your passes and shots to fly straight.
- Working out the best pocket placement for your playing style is essential. In this guide, we're going to show you a mid pocket style, but as you gain experience in how to string a lacrosse head, you'll be able to adapt this. We've given a few tips on adjustments at the end of the guide.
How to string a lacrosse head top string
We'll start at the top. Double-check that your mesh is the right way round - rough side towards the inside of the pocket. Now take your top string and follow these steps:
- Work from left to right, tying knots to keep each of the double rows of diamonds tightly connected to the top row of holes in the head.
- Maintain an even tension as you work. You don't want one side to be tighter than the other, as this will cause instability and inaccuracy in your shots and passes.
- Once you've completed the full row of knots, check that your mesh is aligned symmetrically with the head and that there's no stretching to either side.
How to string a lacrosse head sidewall
When you're happy that your top string is secure, it's time to move on to the sidewalls. We recommend that you start at the top of the lacrosse stick head and work your way down. Rather than stringing one sidewall at a time, it's best to do both at once, tying the first knot on one side, then switching to the other, and continuing down the head.
Stringing both sides at once ensures that your stringing remains consistent, which is essential for the creation of the pocket. It will also allow you to match the tension on both sides and check it as you go, rather than having to completely restring one side if you find it doesn't match at the end of the process.
As you work your way down, you should see the shape of the pocket start to form.
How to string a mid pocket
To achieve the perfect mid pocket, you need to pay attention while stringing your sidewalls and your bottom string. Different tensions or spacing in each of these areas will create a separate pocket.
At the top of the head, you need to ensure you pull the first couple of rows of diamonds tight, so the mesh is flatter at this point. If the first rows are tight, a well-shaped channel allows the ball to be released smoothly from your stick. Further down, you want the diamonds to be more bunched up, which loosens the mesh and forms a pocket midway down the head.
To break in your pocket, wet your mesh with warm water, and use either your fist or a lacrosse ball to form the pocket, just as the ball would typically sit. Some players even secure the ball in the pocket with a stick jammed through the mesh below the sidewalls. You can leave it for a few hours, or overnight, to shape the pocket.
You also need to check that your pocket depth is legal. Put a lacrosse ball into the pocket, and as long as there's no space above the ball when viewed side-on, you're good to go. If not, you'll need to make adjustments. Otherwise, you're risking a penalty. If your pocket is too deep, you'll be able to fix this when you move on to the bottom string.
How to string a lacrosse head bottom string
The bottom string has a significant effect on the head's overall performance, and small adjustments can make quite a difference in how the ball is caught and released.
In terms of technique, stringing the bottom string is similar to the top string. You'll weave between the bottom row of diamonds and the holes at the edge of the head. However, unlike the top string, where you want to keep maximum tension, you can vary the tension a little to get the desired pocket shape and size.
We'll discuss the effects of different bottom string tensions further under "Adjustments" below.
How to string the shooting strings
Unlike the other types of string, the shooting strings weave together through the mesh, and the most popular method is a straight weave. Different types include rolled, nylon laced, or even no shooting strings at all.
Depending on your pocket and channel's exact shape, you'll want to experiment with the placement of your shooting strings to see which gives the best ball performance. As a general rule, though, you should have the closest string to the ball looser than the other strings, which should tighten as you work up towards the scoop.
It's important to remember that NCAA and NFHS rules prohibit any shooting strings which are more than four inches from the top of the scoop. Make sure your shooting strings are within this margin, or you'll risk an equipment penalty.
Trimming the strings
Once you've finished stringing your lacrosse head, you'll invariably find that you have a lot of extra lengths of string. To tidy these up, use your scissors to cut off the remaining length, leaving an inch or two if you need to make slight adjustments later. Carefully burn the cut ends with your lighter to ensure that the ends don't fray.
Testing
With your stick laced and ready to go, you'll want to put in some time testing it out, so you can ensure the pocket position and depth, and the placement of the shooting strings, works for you. Use a lacrosse rebounder like this if you're training alone, or pair up with another player to practice shots, passes, and catches. Take note of anything that doesn't feel quite right, so you know what adjustments to make later.
Adjustments
Once you're confident you know how to string a lacrosse head in a basic style and test it out, you may want to make a few adjustments to suit your unique playing style better.
- If you need to increase the amount of whip you're getting, loosen up the bottom string. The opposite applies if you need to adjust for less whip.
- If you have a tight channel, you may find the ball whips down too much. You can usually fix this by loosening or even removing one or more of the shooting strings.
- Replacing cotton shooting strings with nylon can help add more whip.
Hopefully, our stringing lacrosse head guide has helped you better understand not just how to string a lacrosse head, but how the different elements affect your overall stick performance, and ultimately your game. Of course, as we've said, every player's style is unique, so there's no substitute for trying out some of these tips for yourself to discover what setup works best for you.


Leave a comment (all fields required)